


Keeping your KM5 burr grinder clean is essential for maintaining its performance and longevity. We recommend cleaning the inside of your grinder every 3-6 months, depending on the type of coffee you're using and how frequently you grind. Darker roasts contain more oil and can stick to the grinder's interior, making it necessary to clean more frequently. Failing to clean the grinder regularly can negatively affect the flavor of your coffee.
To clean the inside of your grinder, you can either use a specialized coffee grinder cleaning product like Urnex Grindz or disassemble it and clean it manually. This step-by-step article will guide you through the manual cleaning process.
Step 1: Unplug the Grinder

Before disassembling the grinder, make sure it is unplugged from the power outlet to minimize the risk of electric shock or personal injury.
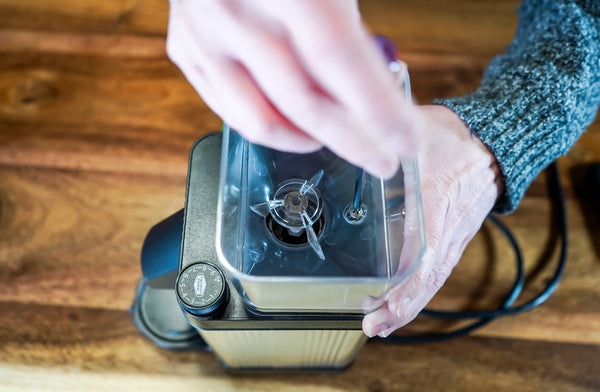
Step 2: Empty the Bean Hopper
Empty the bean hopper before beginning the disassembly process. First, remove the glass grounds container, then carefully pour out the contents of the hopper. Transfer the remaining beans to an airtight container or dispose of them.
Step 3: Remove the Bean Hopper

Use a Phillips #2 screwdriver to unscrew the screw that secures the bean hopper to the grinder. Loosen the screw to a point where the hopper can be safely removed while keeping the screw inside the hopper for safekeeping.
Step 4: Remove the Maintenance Lid


Removing the bean hopper from the grinder will reveal the Maintenance Lid, which covers the burr chamber. The lid is secured to the grinder with two tabs that you will push towards the back of the grinder, then lift up to remove.
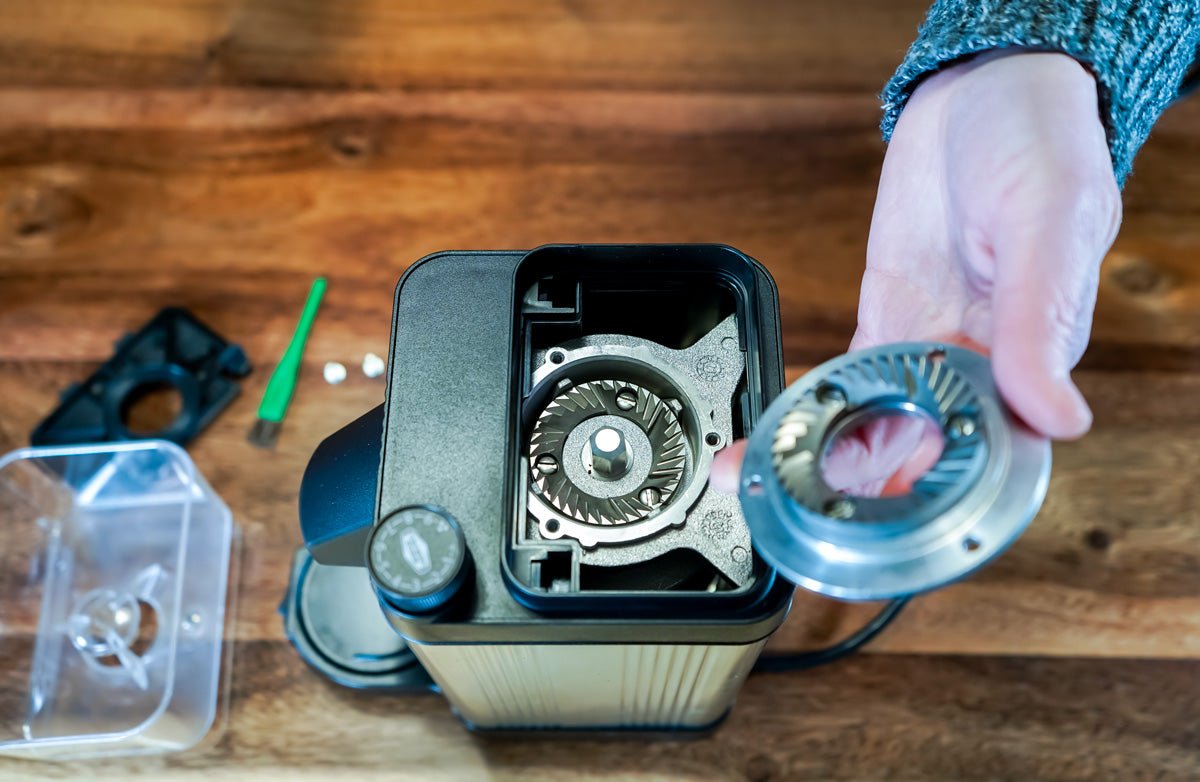
Step 5: Remove the Upper Burr Carrier


Next, you'll see the upper burr carrier, which resembles a steel disk and is secured to the grinder with three screws. Use a Phillips #2 screwdriver to remove the screws, and place them in a safe spot like the bean hopper. After removing the screws, gently lift the upper burr carrier off the grinder.
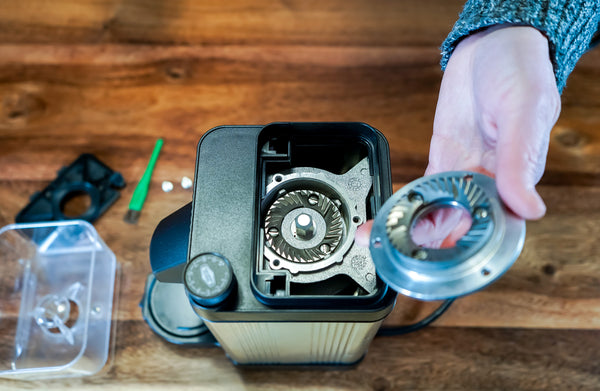
Step 6: Clean the Grinding Chamber


You're now able to see inside the grinding chamber. Use a soft brush to gently sweep away any coffee grounds or beans that are present. For a more thorough cleaning, you may also utilize a vacuum cleaner to remove any residual debris.
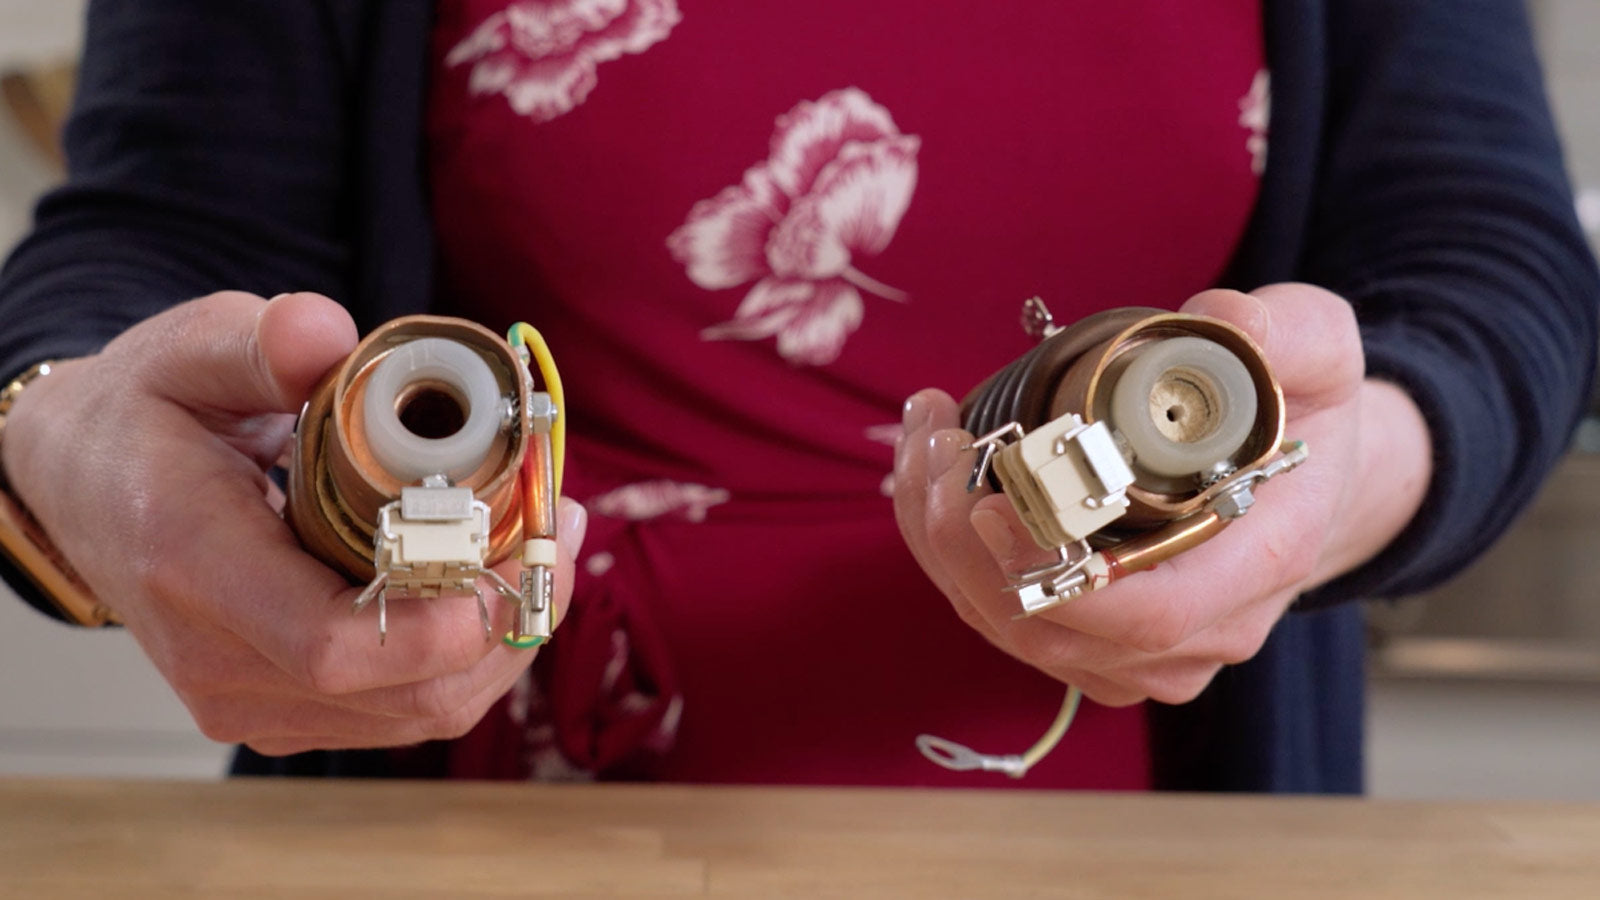
Step 7: Clearing a Blockage


Step 8: Reassemble the Grinder
Reverse the above steps to reassemble the grinder. Take care not to overtighten the screws when reattaching the upper burr carrier and hopper. Keep in mind that the hopper should have some back-and-forth movement when properly attached rather than being completely immobile.